Last Updated on April 1, 2022
A long day of cooking meat in a homemade smoker is quintessential barbecue whether smoking brisket, pork, chicken, sausage, or more.
But what if you don’t have access to a smoker, a smaller pellet grill, or even a charcoal grill that you could set up for smoking? What if you live in the city and have no room to properly smoke a brisket or pork butt?
Is it possible to smoke barbecue beef in your oven? We set out to find out.
After some extensive research on how the best barbecue minds of the Internet have attempted this feat, we began to test the various processes outlined to see if we could make our own smoked barbecue at home.
What You Need to Smoke Meat in the Oven
Everyone seems to agree that if you want to smoke meat in an oven, you need to figure out how to create the same wood-smoke environment in your oven as would exist in a smoker. This needs to be done while keeping the low-temperature cooking environment that occurs in a meat smoker.
The best way—it seems—to do this is by soaking your favorite barbecue wood and heating them in the oven with your meat.
The first thing I did was find different types of wood to use to create that memorable smoky barbecue flavor. I tend to use more fruity wood such as cherrywood or applewood. Hickory is also great if you want that strong powerful smoke flavor.
For the meat, I used ButcherBox ribs. Dry the ribs thoroughly and rub with your favorite multi-purpose dry rub; this ButcherBox All-Purpose Dry Rub is perfect. Once the ribs are rubbed with spices, you can either let them sit overnight or for 30 minutes. (I have done both and really had the same results in flavor and tenderness.)
Lastly, you’ll need lots of aluminum foil and a deep roasting pan with a roasting rack insert.
Three Processes for Smoking Meat in the Oven
Method #1 – How Everyone Smokes Meat in the Oven
Before preheating the oven, move one oven rack so that it sits on the floor of the oven. Set the oven temperature to 275°F. For this technique, you’ll have a cook time of 3 hours.
Soaked a quart of wood chips in water for an hour. Drain the wood chips reserving 1/4 cup of the water. Then, place the water-soaked chips at the bottom of a roasting pan with the reserved soaking water. But not too much water, you don’t want the wood chips swimming.
Insert the roasting rack and place the ribs on top of the roasting rack. Finally, seal the roasting pan with foil. Make sure that the foil is tented so that there is room for smoke to circulate.
Method #2 – Creating a Smoker Envelope
Follow most of the same directions as the first method for this process. It has the same cook time of three hours, however, set the oven to 300°F.
Make a large “envelope” out of tinfoil, big enough to fully fit in the bottom of the roasting pan. I took a very large piece of foil, folded it in half, and then rolled the sides to seal them shut.
Set up your oven and soak your wood the same way I outlined in method #1. However, take the soaked wood chips and a splash of water and put them in an old pot on the stove. Get the wood chips to start smoking. Once there is a good amount of smoke and the chips are hot, carefully poured them into the foil envelope and seal up the open end.
Take the envelope and put it at the bottom of the roasting pan and poke a few large holes for the smoke to release. Place the roasting rack and ribs on top of your smoker foil packet and then seal the entire roasting pan with a tented foil cover.
Method #3 – The Smoking Gun
For this method I used a smoking gun—smoking guns are available on Amazon; you can get a mid-priced one for $80.
Preheat to oven to 300°F and place the ribs on a sheet pan with a roasting rack. Seal it really well with foil—use masking tape if needed— and leave one small spot to insert the smoking gun hose. Try to seal foil the foil around the hose as best as you can.
Fill the smoking gun with chips, alternating the smoke speed from high to low every 10 minutes for 30 minutes. After this process, quickly pull out the hose and seal up the tinfoil trapping the smoke.
Pop in the oven for 2 1/2 hours.
The Results
I must say, I was so excited when I was trying all of these methods for the first time. My house smelled like a smokehouse. I could not wait to try my smoky ribs, but in the end, I was a little disappointed by some of the outcomes.
Appearance
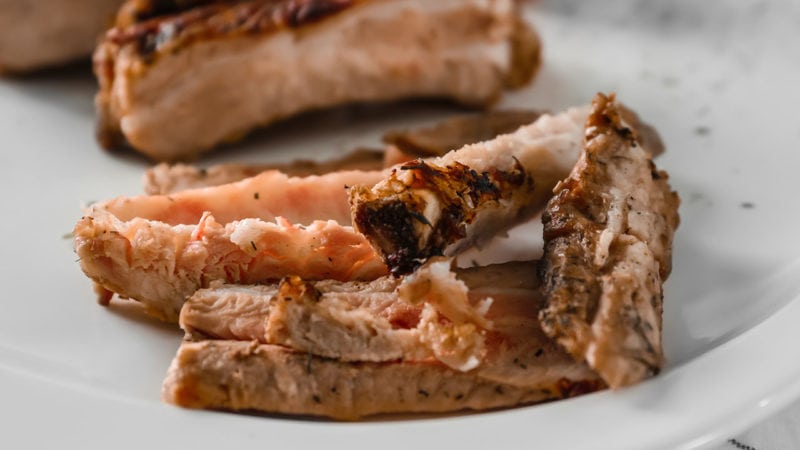
None of these methods created the pink smoke line when you cut into the ribs that you traditionally get when using a barbecue smoker.
Method #1 led to ribs that had meat falling off the bone. And the other methods did create tender looking meat, although they weren’t fall-off-the-bone tender.a
Taste
I was really disappointed by the flavor of the first two methods. Making my house smell like a smokehouse for days did not lead to that smoky, barbecue taste that you get from a traditional smoker.
Using the smoking gun did lead the ribs to have a hint of smoke. It wasn’t an overpowering flavor, but you could taste that there was some smoke and I was pleasantly surprised. Mainly, I was happy that my smoking experiment wasn’t a complete bust.
Conclusion
After all the in-home smoking, I probably didn’t make my landlord too happy.
If you want to smoke meat indoors, I’d say to invest in a smoking gun. I’m not big on gadgets—I’m pretty “old fashioned” when it comes to kitchen equipment—but this one is definitely worth it. So those of you living in apartments, you can still smoke away without having a smoker in backyard!

Emilie Abijanac is a graduate of New England Culinary Institute with over 20 years of catering experience in Boston. Emilie was the Sous Chef for East Meets West Catering and has worked with Kate’s Table and La Fête. Emilie was also the culinary director of ButcherBox.
