Last Updated on May 2, 2022
If I had to eat one dish forever, I would choose the noodle soups that are staples in the food cultures of many East Asian countries. I love all of them: Vietnamese pho, Japanese ramen, Tawainese beef noodle soup (Niu Rou Mian), Japanese udon, Korean beef soup (Galbitang)…the list goes on.
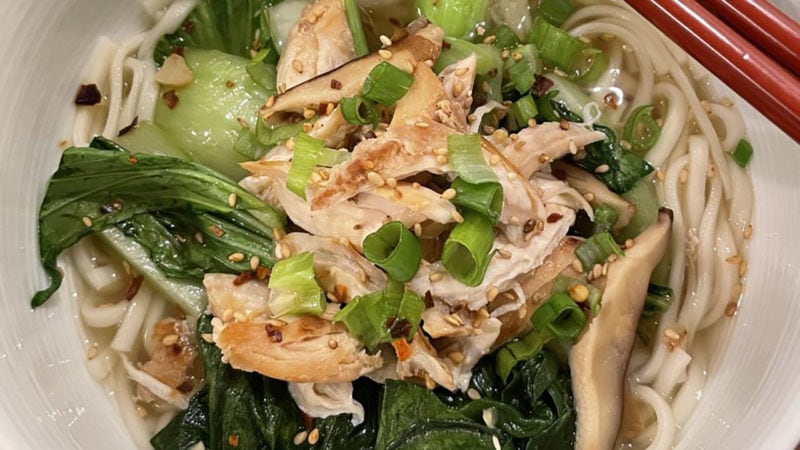
My grandma, who was born in China, made a Chinese noodle soup on the weekend, and my version tends to draw on flavors and ingredients she used: Ginger and garlic as a base, shiitake mushroom, bok choy, and soy sauce. Inspired by my love for other East Asian noodle soups, I also utilize components from other food traditions as well—Japanese noodles and kimchi, for example.
The foundation of my noodle soup recipe is bone-in pork butt. I used to get boneless pork butt to make an easy and delicious carnitas recipe, but my partner, Nick, started urging me to get bone-in, so that we could make bone broth, too. Nick and I find a lot of joy and satisfaction in not letting anything go to waste, and I love that we can use one cut of meat to inspire two totally different dishes.
How to Make Bone Broth
Before we met, Nick had learned how to make bone broth for homemade ramen, so he’s now the bone broth master of our house. Typically, we make carnitas with a majority of the bone-in pork butt meat and then save the bones and surrounding meat to make bone broth—a convenient base for my favorite food.
When cutting the meat off the bones, use a smaller knife. I’ve found that it allows me to work around the bones much easier. Also, if we’re not ready to make bone broth right away, we’ll freeze the bones until we’re ready to use it—just be sure to thaw them before making this recipe.
1. Preheat your oven to 400°F.
2. Place the bones inside a large pot and cover with water. Bring everything to a vigorous boil for about 10 minutes. There should be some light and dark foams that form on the top and along the rim of the water level. After 10 minutes, remove the bones and set them aside in a large baking pan.
3. Cut an onion in half and place it into the baking pan (no need to remove any of the outer layers), along with one or two garlic cloves that are still inside their shell-like covering.
4. Put the baking pan into the oven for 15 minutes or so. You’re looking for the bones to char and brown in most places.
5. While the bones are browning, rinse out the large pot, making sure to wash off the foam and dark stuff that sticks around. These tend to give the broth a funky flavor.
6. Refill the pot with water and set it to boil. The goal here is to have it boiling when you take the bones out of the oven.
7. Once the bones are browned, carefully transfer the bones, onion, and garlic to the boiling water. Make sure you include any meat and fat that is stuck to the baking pan—you definitely want this in the broth! Pouring some boiling water into the baking pan will make it easier to scrape off all of these crispy bits.
8. Add some celery or a carrot to the pot. I usually keep it pretty simple since I’ll use the broth in many different soups and sauces.
9. Add enough water to cover the bones, and bring it to a vigorous boil. Turn down the heat to a very light/slow boil and cover the pot.
10. Let it sit at a light/slow boil for 4 hours. After the first few hours, the meat should separate from the bone and the broth should start to look cloudy. You can take a spoonful from time to time to test the flavor. It should be rich but not very powerful (after all, we haven’t added any salt yet).
11. If you don’t want to store a ton of liquid, turn up the heat slightly and boil off some of the water. The broth is pretty concentrated, so just cut it with water later on when you use it in soup.
12. Once the broth is flavorful enough, turn off the heat. Remove the bone and strip off any remaining meat. These extra bits are great with a dipping sauce.
13. Pour the broth into a wide-basin bowl and cool at room temperature. Putting the broth immediately into the refrigerator can cause your refrigerator to warm up and speed up bacterial growth in your other foods.
14. Once your broth nears room temperature, put it into a storage container and pop it into the refrigerator. As the broth cools, it will congeal. This is a good sign!
15. When it’s time to make a soup or sauce, dilute the broth mixture with water for soups or use it undiluted in sauces (it takes pasta sauce to the next level).
Chinese-Inspired Noodle Soup
I love making this Chinese noodle soup-inspired dish because the options are endless, allowing me to create a soup based on what I have on hand. However, there are six components we always use in my household.
Broth – If you have the time and bones to make your own bone broth, I’d recommend doing so, but you can also use bouillon cubes or store-bought chicken broth.
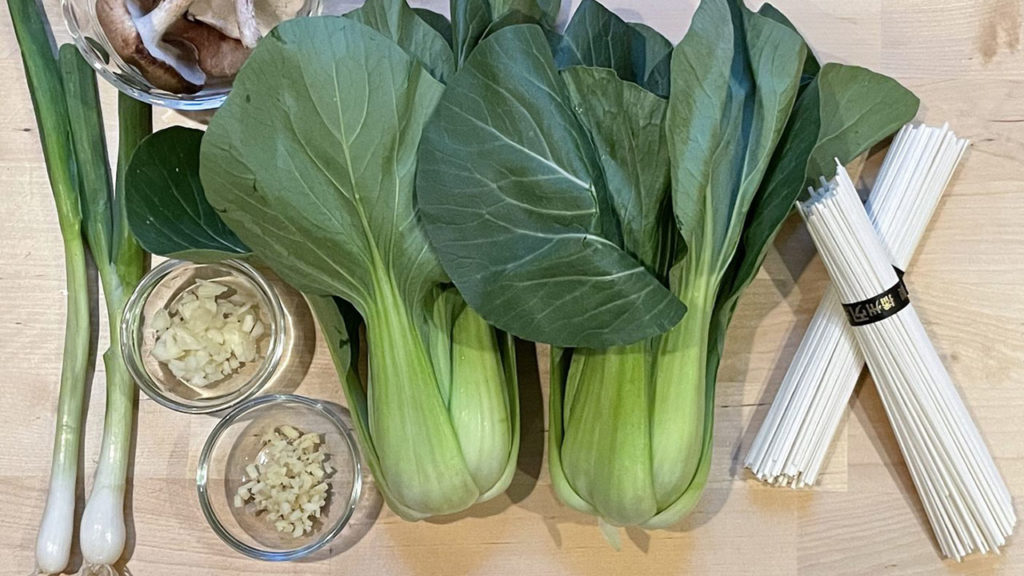
Noodles – There are so many wonderful noodle options, such as bean thread, rice noodles, fresh wheat noodles, udon, and even spaghetti.
Veggies – My go-to is baby bok choy and shitake mushrooms, but you can include almost anything. Try carrots, daikon radish, mushrooms, Asian green veggies like napa cabbage, or spinach.
Protein – When making bone broth, I pick the meat off the bone, season it, and add it back to my soup. But really, any protein works. You can use beef, pork, chicken, fish, tofu, shrimp, and of course, a fried or soft-boiled egg.
Flavors – Key flavors to add to your broth, veggies, and protein include soy sauce, sesame oil, fish sauce, rice vinegar, garlic, and ginger.
Toppings – Depending on what I have on hand, I usually top off my noodle soup with any or all of the following: Kimchi, scallions, cilantro, sesame seeds.
Evadne Cokeh is ButcherBox's VP of Social and Environmental Responsibility. She is working to develop the company's social and environmental responsibility strategy and is the Chair of ButcherBox's Diversity, Equity, and Inclusion Committee.


